User Permissions
Race Space allows you to add multiple users to your account and give them different permissions, so they can only access the information that is relevant to them. This gives your team the ability to work independently, which streamlines your organisation workflows.
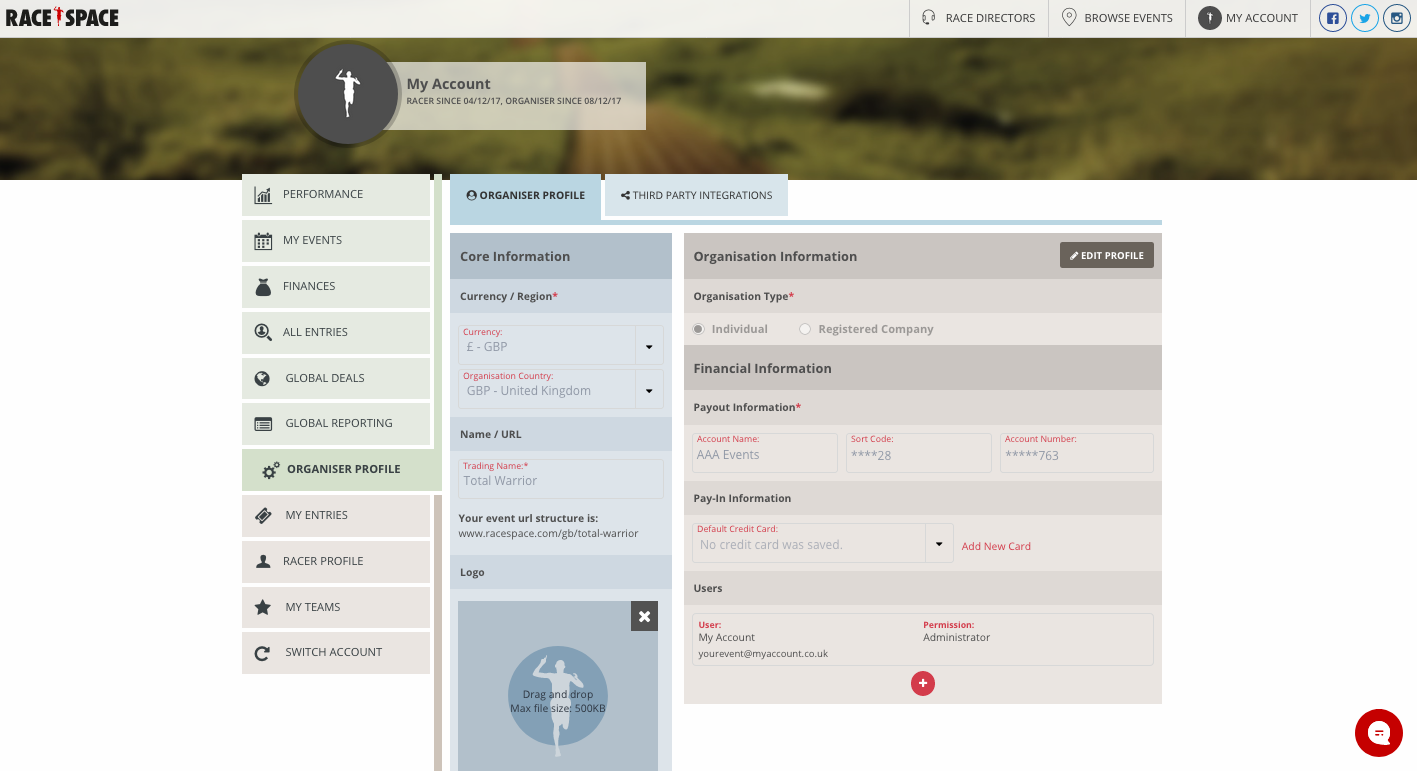
You can access User Permissions through the Organiser Profile tab in the main menu and at the bottom of the Organisation Information section you will see the section called Users. From here you can add new users or remove or edit existing ones.
Setting Up Users
Once you are ready to start setting up User Permissions for your team members, select the + button from the Users section.
This will bring up an Add User side panel. From this side panel you will firstly need to enter the email address of the person you are giving permissions to. Secondly, you will need to select the permission type you are giving this person. There are three different permission types to choose from, which either limit or give access to various areas of your Race Space account. Custom permission types are also available on request.
- Administrator: has full access to the Race Space account. This role can create and edit events, view all finances, reports and participant details and is also the only permission that can delegate, edit and remove other user accounts.
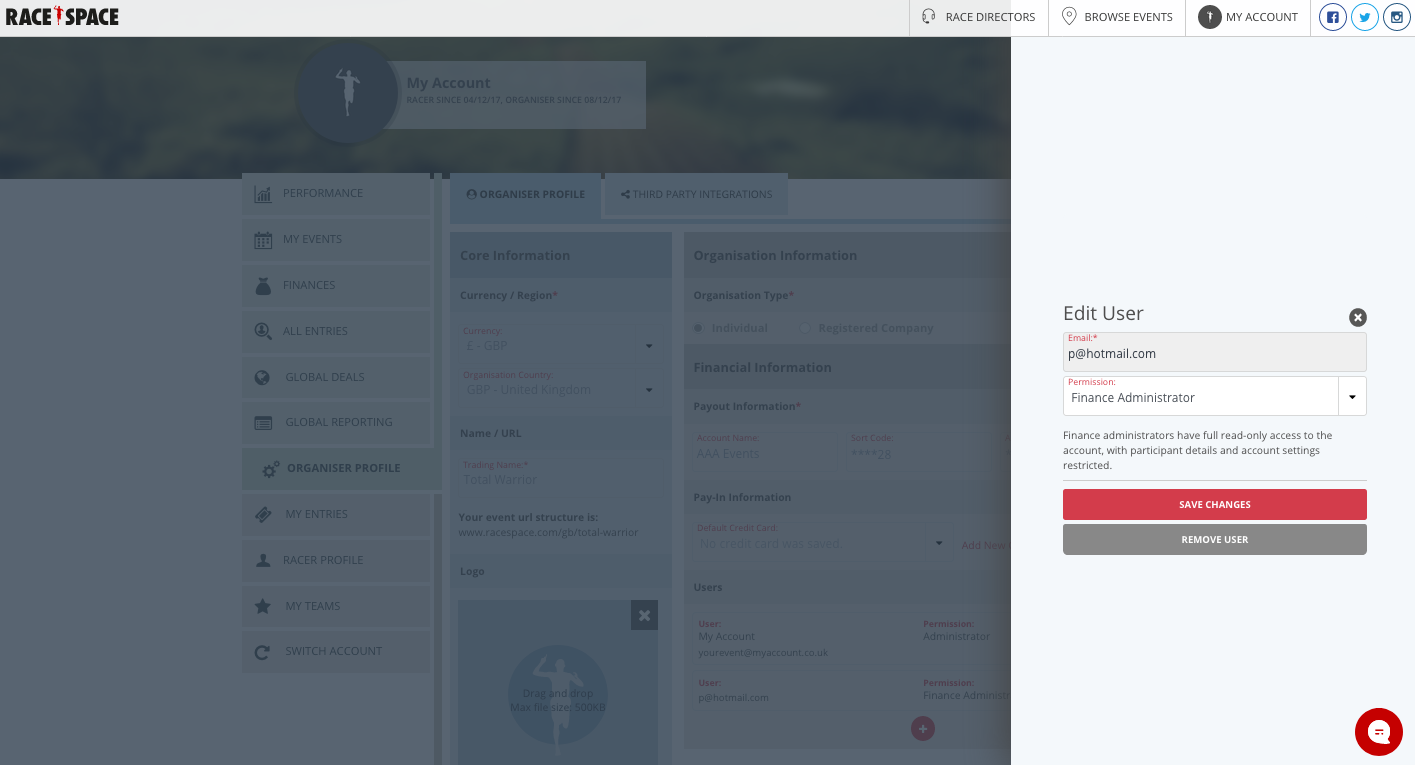
- Finance Administrator: has full read-only access to the account, with participant details and all account settings restricted.
- Super User: has full access to the Race Space account excluding access to organiser profile and account settings.
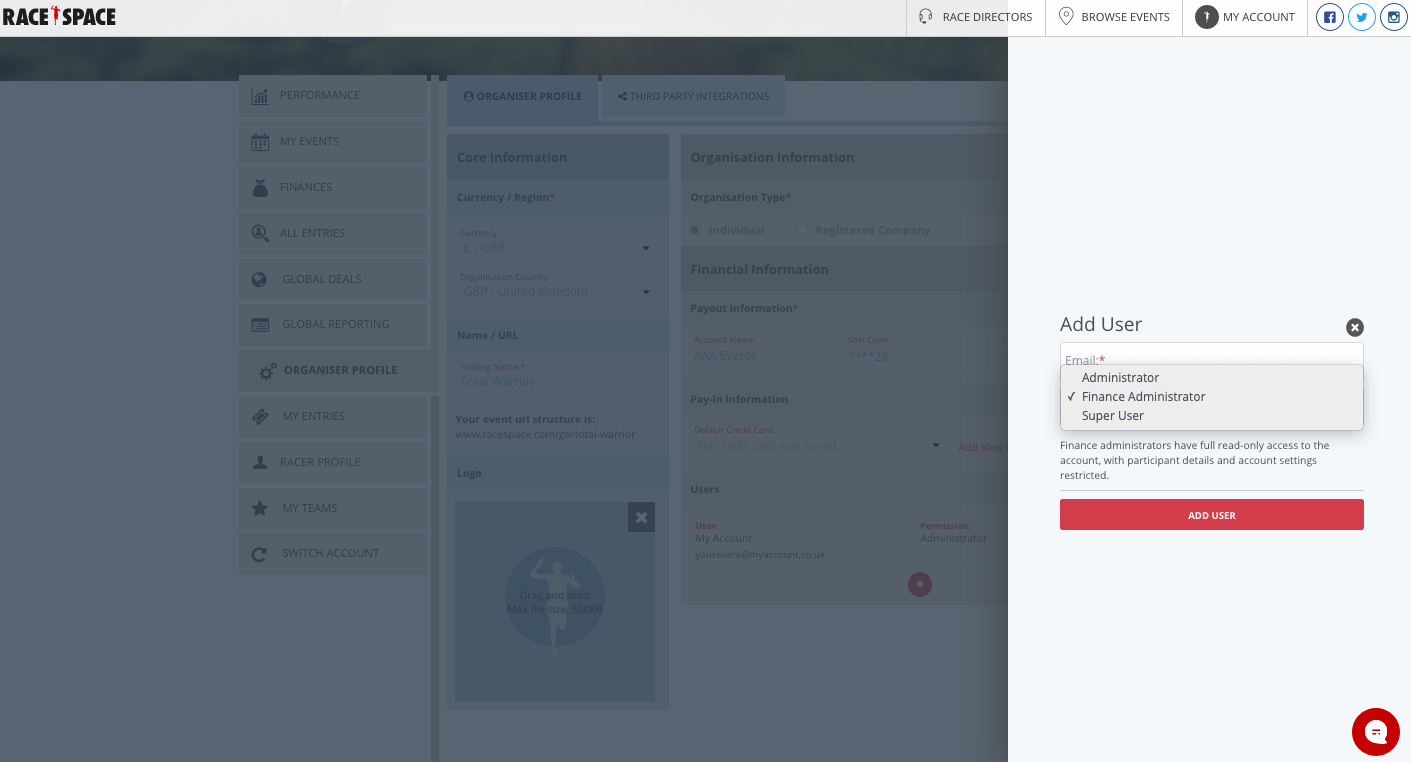
Once you have entered an email address and selected a permission type, select Add User to complete the creation of the user. The new user will receive an email notification and access link.
Delegated Users
For those who have been allocated User Permissions, they will receive an email on behalf of the race organiser stating the permission type they have been allocated and a link to access it.
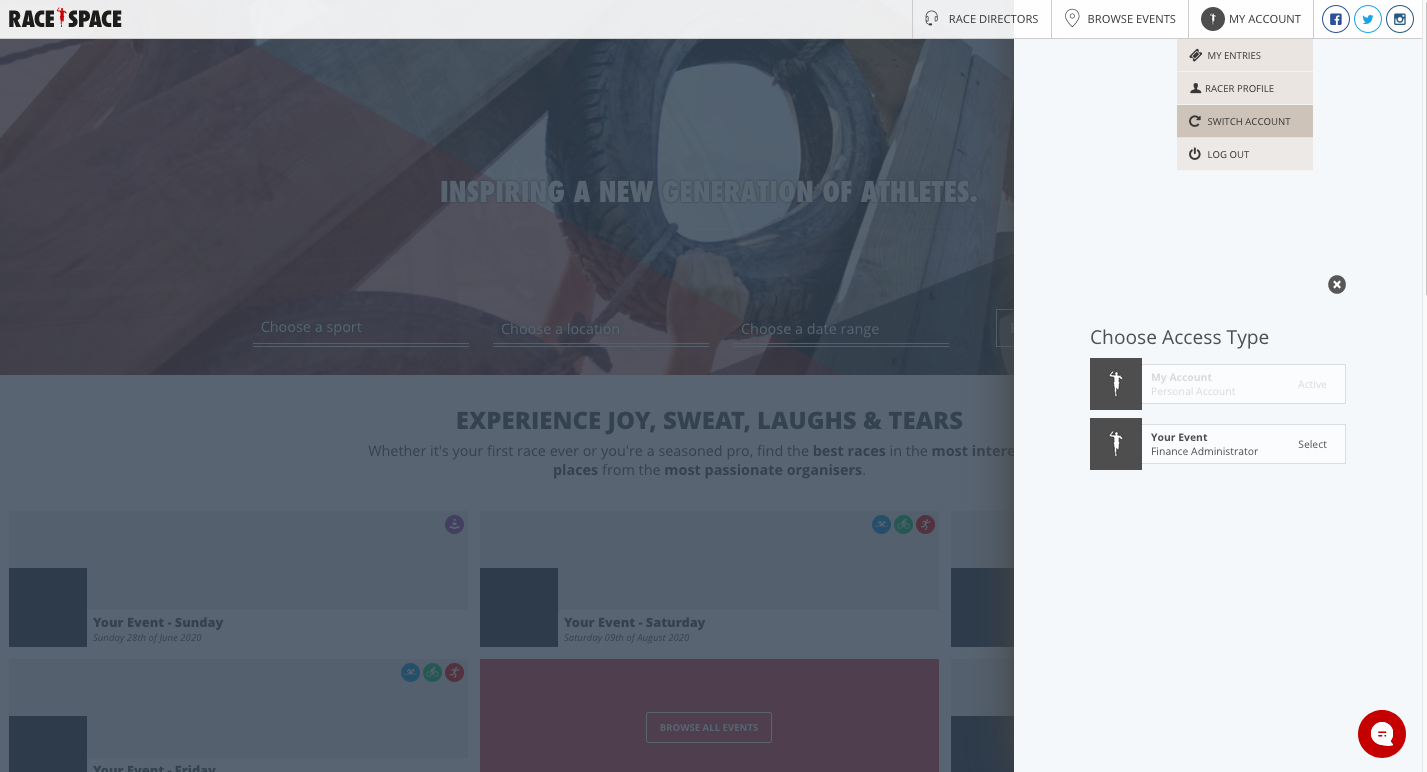
- If they already have a Race Space personal account then on selecting this link they will only need to enter their Race Space account login details. Once entered the Choose Access Type side panel will automatically appear. This side panel will give them the option to choose from either their Personal Account or the new User Permission they have just been assigned.
- If they don’t have a Race Space personal account then once they select this link they will firstly need to create an account and agree to the Race Space Terms & Conditions. Once created they will once again be presented with the Choose Access Type side panel to access their account type options.
- Should you want to quickly switch between accounts, from the My Account drop-down menu there is an option called Switch Account which brings up the Choose Access Type side panel to switch between the account types available for that user.
Editing & Removing Users
To either edit or remove a user you can select the Edit button next to the user you would like to amend.
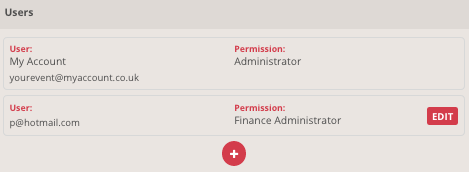
Once selected this will bring up an Edit User side panel. You will notice that the email address section is not editable, however you will be able change the permission type from the drop-down menu. Once you have updated the user you can then select the Save Changes button and these new changes will take effect immediately.
Alternatively from the Edit User side panel you can also select the Remove User button to permanently delete this user.
Still stuck? How can we help?

